info@tekno-eta.com
Monday - Friday 07:30-17:00
+90 262 999 2100

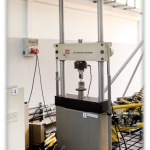
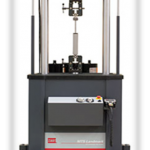
Elastomer Characterization Frames

Tekno - ETA > Elastomer Characterization Frames

Static Characterization Testing (25 kN)

  • In vertical axis (Z)
    • Up to ±25 kN rated force capacity
    • Up to ±25 mm deflection capacity
    • Capability to define consecutive static deflection tests with different or same parameters
    • Capability to define different or same test speeds for pre-test cycles and measurement test cycle
    • Displacement and force controlled test speeds (mm/s, N/s)
    • Defining displacement or force as type of test end levels
    • Defining frame stiffnes to correct measured stiffness and calculate pure stiffness of part.
    • Defining an external LVDT to measure pure stiffness of part directly.
    • Calculating stiffnes by chord or tangential method from one or two defined points of loading or releasing arms of hysteresis curve or from one or two defined points of averaged curve of hysteresis by force or lenght averaging methods.
    • Calculating stiffness for all data points
    • Using a pre-load axis in horizontal dynamic test by force or deflection based control
  • In horizontal axis (X)
    • Up to ±5 kN rated force capacity
    • Up to ±25 mm deflection capacity
    • Capability to define consecutive static deflection tests with different or same parameters
    • Capability to define different or same test speeds for pre-test cycles and measurement test cycle
    • Displacement and force controlled test speeds (mm/s, N/s)
    • Defining displacement or force as type of test end levels
    • Defining frame stiffnes to correct measured stiffness and calculate pure stiffness of part.
    • Defining an external LVDT to measure pure stiffness of part directly.
    • Calculating stiffnes by chord or tangential method from one or two defined points of loading or releasing arms of hysteresis curve or from one or two defined points of averaged curve of hysteresis by force or lenght averaging methods.
    • Calculating stiffness for all data points
    • Using a pre-load axis in vertical dynamic test by force or deflection based control
  • In horizontal axis (Y)
    • Manually adjustment in Y direction
    • Capability of adjusting alignment of test specimen to upper mounting interface of test system by powerscrew handle
    • Up to ±2 kN rated force capacity with a load cell plate assembled by piezo-electric force trancducers for measuring and monitoring not controlling

Static Characterization Testing (50 kN)

  • Uni-axial testing frame
  • Up to ±50 kN rated force capacity
  • Up to ±60 mm deflection capacity
  • Capability to define consecutive static deflection tests with different or same parameters
  • Capability to define different or same test speeds for pre-test cycles and measurement test cycle
  • Displacement and force controlled test speeds (mm/s, N/s)
  • Defining displacement or force as type of test end levels
  • Defining frame stiffnes to correct measured stiffness and calculate pure stiffness of part.
  • Defining an external LVDT to measure pure stiffness of part directly.
  • Calculating stiffnes by chord or tangential method from one or two defined points of loading or releasing arms of hysteresis curve or from one or two defined points of averaged curve of hysteresis by force or lenght averaging methods.
  • Calculating stiffness for all data points

Static Characterization Testing  (600 kN)

  • Uni-axial testing frame
  • Up to + 600 kN, -400 kN rated force capacity
  • Up to ±250 mm deflection capacity
  • Capability to define consecutive static deflection tests with different or same parameters
  • Capability to define different or same test speeds for pre-test cycles and measurement test cycle
  • Displacement and force controlled test speeds (mm/s, N/s)
  • Defining displacement or force as type of test end levels
  • Defining frame stiffnes to correct measured stiffness and calculate pure stiffness of part.
  • Defining an external LVDT to measure pure stiffness of part directly.
  • Calculating stiffnes by chord or tangential method from one or two defined points of loading or releasing arms of hysteresis curve or from one or two defined points of averaged curve of hysteresis by force or lenght averaging methods.
  • Calculating stiffness for all data points

Dynamic Characterization Testing  (600 Hz)

  • 3 Axis testing frame
  • In vertical axis (Z)
    • Capability of sine sweep and sine dwell test
    • Up to 600 Hz test frequency range capacity
    • Up to ±25 kN rated force capacity with a load cell plate assembled by piezo-electric force trancducers for measuring and controlling
    • Up to ±25 mm deflection for measuring and controlling
    • Precisely controlling dynamic amplitude as based displacement or force
    • Precisely controlling mean level as based displacement or force
    • Defining the test frequencies as consecutively and arbitrarily in sine dwell tests
    • Defining sweep rate as linear or logarithmic in sisne sweep tests
    • Calculating frequency dependant loss, storage and complex dynamic rigidity, damping coefficent, phase angle, transmissibility, loss energy and etc.
    • Correcting of dynamic displacement to be used stiffness calculation by taking measurement from an accelerometer on actuator after 120 Hz
    • Compansating dynamic forces by subtracting inertial effect of total masses on load cell plate using an aditional accelerometer on that plate from total measured dynamic force
    • Using a pre-load axis in horizontal dynamic test by force or deflection based control
  • In horizontal axis (X)
    • Capability of sine sweep and sine dwell test
    • Up to 50 Hz test frequency range capacity
    • Up to ±5 kN rated force capacity with a load cell plate assembled by piezo-electric force trancducers for measuring and controlling
    • Up to ±25 mm deflection for measuring and controlling
    • Precisely controlling dynamic amplitude as based displacement or force
    • Precisely controlling mean level as based displacement or force
    • Defining the test frequencies as consecutively and arbitrarily in sine dwell tests
    • Defining sweep rate as linear or logarithmic in sisne sweep tests
    • Calculating frequency dependant loss, storage and complex dynamic rigidity, damping coefficent, phase angle, transmissibility, loss energy and etc.
    • Using a pre-load axis in vertical dynamic test by force or deflection based control
  • In horizontal axis (Y)
    • Manually adjustment in Y direction
    • Capability of adjusting alignment of test specimen to upper mounting interface of test system by powerscrew handle
    • Up to ±2 kN rated force capacity with a load cell plate assembled by piezo-electric force trancducers for measuring and monitoring not controlling
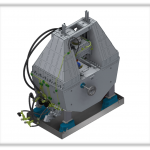
Dynamic Characterization Testing (200 Hz)

  • Uni-axial testing frame
  • Capability of sine dwell test
  • Up to 200 Hz test frequency range (Max. Frequency capability depends to stiffness of specimens, )
  • Up to ±50 kN rated force capacity
  • Precisely controlling dynamic amplitude as based displacement or force
  • Precisely controlling mean level as based displacement or force
  • Defining the test frequencies as consecutivly and arbitrarily
  • Calculating frequency dependant loss, storage and complex dynamic rigidity, damping coefficent, phase angle, transmissibility, loss energy and etc.

High Frequency Dynamic Characterization Testing (2800 Hz)

  • Capability of sine sweep test
  • Up to 2800 Hz test frequency range capacity
  • Up to ±60 kN rated force capacity with a load cell plate assembled by piezo-electric force trancducers for measuring
  • Up to ±3grms acceleration for measuring and controlling
  • Precisely controlling dynamic amplitude as based acceleration
  • Defining sweep rate as linear or logarithmic in sine sweep tests
  • Calculating frequency dependant loss, storage and complex dynamic rigidity, damping coefficent, phase angle, transmissibility, loss energy and etc.

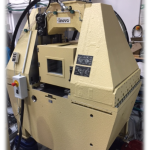
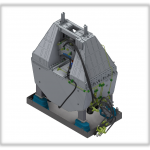
Torsional Testing Machine

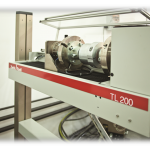
The purpose of a torsion testing is to determine the behavior a material or test sample exhibits when twisted or under torsional forces as a result of applied moments that cause shear stress about the axis.

We are able to carry out static torsional characterization and static cardanic characterization tests by torsional testing machine that has the technical specifications below.

Torque Measurement Range: ± 20 Nm and ± 200 Nm (sensitivity is 1%)

Angular Displacement Range: ±36000 °

Rotational Speed in Revolutions: 0.0005 to 90 rpm

Rotational Speed in Degrees: 0.036-32400 °/min

To request a quote for our services please complete our RFQ Sheet Form.

Would you like to see our references ?